Thursday, April 5, 2012

Feathers Galore!

We've just finished up production on a really fun project working with artist Erin Palmer.  She came to us to help with fabrication of about 1000 glass feathers for a public art installation of her design. Although we haven't seen the final, installed piece, we're looking forward to it!  Here's a brief illustration of our process:

First, lots and lots of cutting.  Erin created about two dozen patterns, each corresponding to feathers from actual northwest bird species.  They ranged from tiny to over a foot long.  Here, I'm scoring a crow feather. 


This is the crow feather, fully cut out.  Most of the time they broke out in one piece, but some shapes were certainly easier than others.


 Next, the feathers were painted.  Each pattern had a specific color scheme, and many shapes had different variations. 


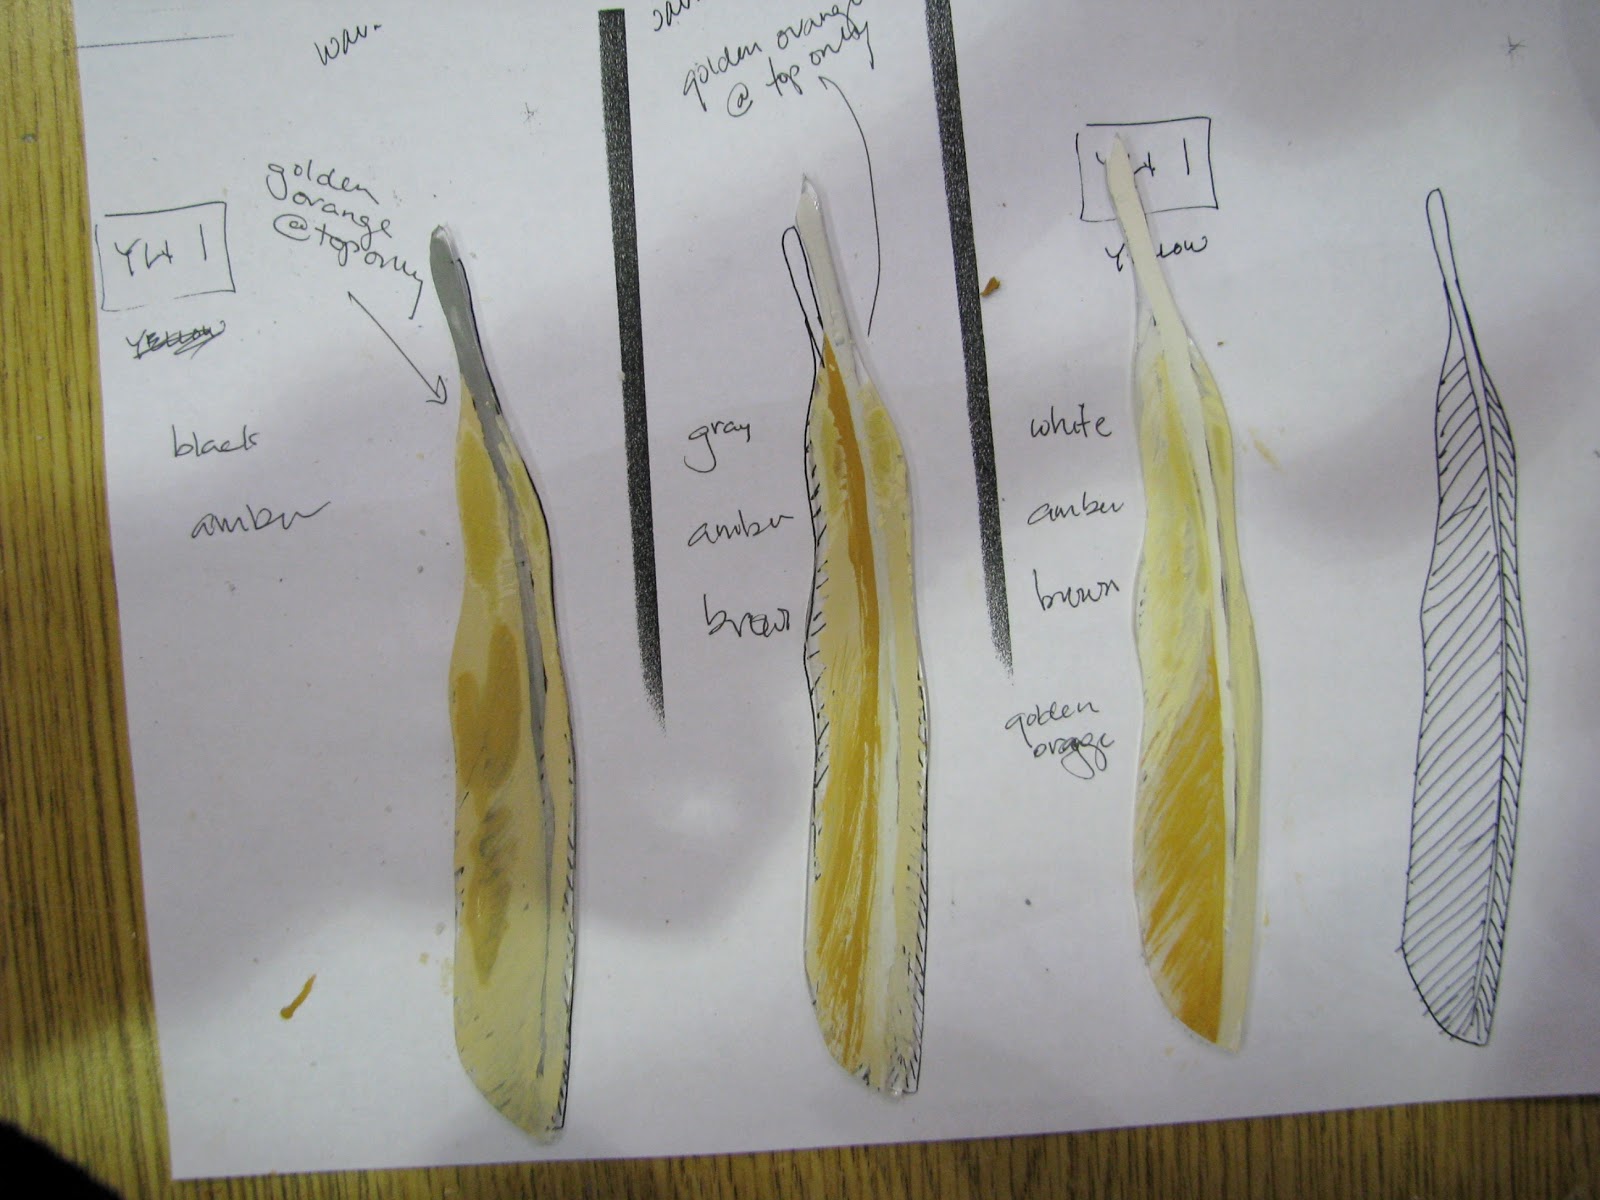
We quickly found that for ease of production is was most efficient to paint in stages.  Often, we had many batches going at once, allowing our paints to dry before each additional layer was added.


Once the feathers were painted, they needed texture added.  By carving quills and veins (barbs!) into refractory, we created molds.  This was also a messy, time consuming project.  Here are a few molds.


Once the feathers were patterned using the mold, they were nearly done.


Now all that remained was to slump the feathers into molds, to give them curvature they'd need for realism.  At this point it was gratifying to see lots of pieces approaching completion.


Once colored, textured and bent, the feathers were nearly ready for installation.  Our part was pretty much done at this point.


 We're now anxiously awaiting some photos of the finished installed piece!

Wednesday, September 14, 2011

Garden Woes


It's been a tough summer here for the garden at the studio.  Our cool, damp spring stretched well into summer, and even though we had an intense burst of warm, dry weather, it hasn't been enough.  Tomatoes have started to ripen, but squash, zucchini and cucumbers probably won't produce this year.


We also continue to battle the most aggressive slugs in the world, and anything I've sowed from seed gets mowed down before it makes any headway.  


Luckily we have well established kale and chard from the spring, and I also started some more in addition to napa cabbage and collards in a seedling tray.  I'm hoping to get them a few inches tall and possibly protect their stems with something when I put them in.  Green beans are just starting, and if we get a  few more days of sun we'll get a good batch of them.


The peas that George sowed in July managed a handful of pretty sweet peas before it got too hot for them.

The plants still look pretty healthy, and if it stays cool they may continue.  Fava Beans were a hit this year, so we'll likely do more of them, and maybe a few rows of garlic as well.  Maybe next year will be better?

Thursday, September 8, 2011

End of summer

We're just finishing up with one big project, and embarking on a few new ones. This is a lantern that's part of a much larger chandelier.


Its panels are cast from slabs we make from recycled glass scraps in the studio. There's tons of detail in the patterns-it's kind of a shame that it'll be hung so high up.

Here you can see Pepper ignoring the layout of more lantern panels.


This large woven glass pyramid is the center of the chandelier. It's about 30 inches across, and takes tons of pretty exact layout!


This last photo is of some new (to us) paint we're experimenting with. It creates intricate but random patterns which are hard to photograph. We're still learning how to control its application and firing a little better.

Wednesday, June 1, 2011

Conserving and Recycling in the Studio


This sink is made from thick clear scrap, which is cut into uniform small pieces, cast into a solid disc, then formed into a bowl.  The last step is drilling out the drain hole.
 Here at George C Scott Studios we seek to create innovative and beautiful art glass, but we strive to do it in an environmentally sound way.  Much of the raw glass that turns into our finished products comes to us as a waste product from another source.
Layered blues cast from our in-shop scrap.  This material would be great as a counter or bar.
These might be trimmings and scrap from a large art glass manufacturer here in the Pacific Northwest, which we buy in buckets, or whole sheets of glass that do not meet a producers exacting standards for their intended purpose.  Because so much of the art glass we make is cast (formed of smaller pieces of glass melted together into a larger item), we are able to put this waste to good use. 
This "Safari" style casting could be great as a sconce.
We practice this same passion for efficiency with the waste that we generate in our own studio.  Much of our exciting layered and cast slabs are made of trimmings from earlier projects.  We rarely throw away glass, and we also focus and reusing packing materials when appropriate.
This cross section shows some great organic textures and movement of bubbles, and is made from glass that we recycle in studio.

Sunday, April 17, 2011

Sconce Completion

This pair of sconces has now been finished and sent off to their new home.  Here's how they were completed.  Using the ground and faceted glass as a guide, we ground aluminum backings to match each piece of glass individually.


Once ground to size, holes are drilled for the light source and attachment point.
 Next, the glass was glued into place.


Here's the shade all wired up, ready to go!

Wednesday, April 6, 2011

Sconce Creation Part II

We're nearing completion of this sconce project, but I thought I'd illustrate some more of the intermediate steps.  When we left the sconces they had just been loaded into cone molds in our small kilns.  After running through a program which slumped the individual components and fused them together, the sconces looked like this (similar to a small lighting pendant):


 Next, I cut each of these cones in half.
Once divided in two, each half was loaded into a kiln setup that would allow the edges of the glass to be supported while the inside could deform with heat and gravity's pull.
The inside of the glass is the shape we were after, and the exterior "wings" were now just scrap.  Once they were removed, the sconce was ground down closer to its final size and shape.


Once the edges were shaped, I then faceted them so that the glass would sit flat against the aluminum backing that it will eventually be mounted on.

Stay tuned next week for the completion of our custom sized sconce project!

Thursday, March 17, 2011

Sconce

This week I thought I'd show you some of the process involved in making some fused and slumped glass lighting.  I started construction of some sconces which are currently fusing, and I'll show you the completion of the process in the coming weeks.  The first part of this sconce involves cutting a number of glass rings.


These are all loaded into a mold with a small slumped glass cone that will form the center of the sconce.  They're stacked one by one.


The number of rings will determine the end diameter for this slumped glass sconce (or, actually, the two that will be made from this cone).


Three of these are currently in the kilns.  We'll pick up next when we remove the fully fused cones from their molds.